Are you ready to take your plastering skills to the next level? In the world of plastering, as the saying goes, ‘practice makes perfect.’ But why settle for perfection when you can achieve excellence?
In this article, we will guide you through the process of avoiding common mistakes in plastering, with expert advice straight from the UK. Whether you’re a seasoned plasterer or just starting out, this article is designed to help you elevate your craft to new heights.
From proper preparation to achieving a smooth finish, we will provide you with step-by-step instructions and insider tips that will ensure your plastering projects are a resounding success. We’ll cover everything from mixing and applying plaster to drying and curing techniques.
Additionally, we’ll share valuable insights on finishing touches that will give your plastered surfaces a professional and polished look.
So, if you’re ready to innovate and leave the competition behind, let’s dive into the world of plastering and discover how to avoid those common mistakes that hold you back from achieving greatness.
Proper Preparation for Plastering
Before diving into the art of plastering, it’s crucial to ensure you’ve properly prepared the surfaces to achieve a flawless finish.
Preparing the surface is the first step towards a successful plastering project. Start by removing any loose paint or wallpaper and filling in any cracks or holes with a suitable filler.
Once the surface is smooth and even, it’s important to prime the walls before applying plaster. This will help the plaster adhere properly and prevent it from cracking or peeling in the future. Use a high-quality primer and apply it evenly, following the manufacturer’s instructions.
Once the walls are primed, you’re ready to move on to the next section about mixing and applying plaster, where you’ll bring your walls to life.
Mixing and Applying Plaster
To ensure a successful plastering job, it’s crucial to choose the right plaster mix. Consider factors such as the type of surface you’re working on and the desired finish.
Additionally, applying plaster with the correct technique is essential for achieving smooth and even results. Make sure to follow proper mixing instructions and apply the plaster evenly and consistently for a professional finish.
Choosing the Right Plaster Mix
Don’t forget to select the perfect plaster mix, mate, to ensure a smooth and flawless finish on your walls.
When it comes to plaster mix ratios, it’s crucial to get the right balance of ingredients. For a traditional sand and cement mix, a ratio of 3:1 (sand to cement) is commonly used. However, for a more lightweight and flexible option, you can opt for a gypsum plaster mix.
This type of plaster is ideal for plastering your ceiling. If you’re working on external surfaces, consider using a lime plaster mix, which offers excellent breathability and weather resistance.
Remember, choosing the right plaster mix for the specific surface you’re working on is essential for achieving the best results.
Now, let’s move on to applying plaster with the correct technique.
Applying Plaster with the Correct Technique
Mastering the art of applying plaster with the correct technique will result in a flawless and professional finish on your walls. To ensure success, it’s crucial to avoid common mistakes and errors. Here are five key points to keep in mind:
- Use the right amount of pressure when spreading the plaster. Applying too much force can cause uneven thickness and lumps.
- Maintain a consistent speed throughout the application process. Hurrying or slowing down can lead to an inconsistent finish.
- Always use clean tools and equipment. Any debris or old plaster left on the tools can affect the quality of the application.
- Apply the plaster in thin layers, building it up gradually. Thick layers can crack and result in an uneven surface.
- Smooth out any imperfections as you go. It’s easier to correct mistakes early on rather than trying to fix them later.
By following these guidelines, you’ll be well on your way to achieving a smooth finish on your plastered walls.
Achieving a Smooth Finish
To achieve a smooth finish on your plaster, it’s important to use the right tools for smoothing, sanding, and polishing.
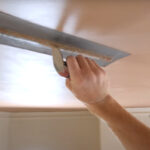
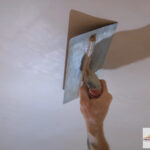
Start by using a trowel or a plastering float to smooth out any uneven areas.
Next, use sandpaper or a sanding block to gently sand the surface and remove any imperfections.
Finally, finish off by using a polishing tool or a damp cloth to give your plaster a polished and professional look.
Using the Right Tools for Smoothing
Using the appropriate tools is crucial for achieving a smooth finish when plastering, so it’s essential to have the right equipment to hand. When it comes to smoothing out plaster, there are a few key tools that can make the job much easier and more efficient.
One of the most important tools is a plastering trowel, which allows you to spread and smooth the plaster evenly. A corner trowel is also useful for getting into tight spaces and achieving a clean finish.
Additionally, a feather edge or straightedge can help you achieve a level surface. Finally, a plasterer’s float is essential for achieving a smooth and polished look.
By using these tools correctly, you can avoid common plastering mistakes and achieve a professional-looking finish.
Now, let’s move on to discussing sanding and polishing techniques for that final flawless touch.
Sanding and Polishing Techniques
Once you have the right tools for achieving a smooth finish, sanding and polishing techniques can add that final flawless touch to your plastered surface, giving it a shiny and pristine appearance.
To enhance plaster durability and ensure a seamless finish, follow these expert tips:
- Patching imperfections: Before sanding, make sure to address any cracks or uneven areas by using a suitable filler. This will ensure a smooth and even surface to work with.
- Sanding technique: Use a fine-grit sandpaper to gently sand the plastered surface in circular motions. Start with a light touch and gradually increase pressure for stubborn imperfections.
- Polishing: After sanding, use a damp cloth to wipe away any dust particles. Then, apply a thin layer of polish using a clean cloth. This will add shine and protect the plaster from future damage.
By employing these techniques, you can achieve a flawless and durable plastered finish.
In the next section, we will explore common mistakes to avoid, ensuring a successful plastering project.
Avoiding Common Mistakes
Don’t make the mistake of skipping proper preparation; start by prepping the surface and gathering all necessary tools before you begin plastering.
One of the most common mistakes in plastering techniques is not ensuring that the surface is clean, dry, and free from any loose debris. This can lead to adhesion problems and an uneven finish.
Another mistake to avoid is applying too much plaster at once. It’s important to work in small sections and build up the layers gradually for a smooth and consistent result.
Additionally, make sure to mix the plaster according to the manufacturer’s instructions to avoid any issues with drying and curing.
By following these tips for avoiding plastering errors, you can achieve professional-looking results without any hiccups.
Now, let’s move on to the next section about drying and curing.
Drying and Curing
After properly prepping the surface and applying the plaster, it’s crucial to allow enough time for drying and curing to ensure a strong and long-lasting finish.
The drying time of plaster can vary depending on factors such as humidity and temperature. Generally, it takes about 24 to 48 hours for the plaster to dry completely. However, it’s important not to rush the process, as insufficient drying time can lead to cracks and a weaker finish.
Once the plaster is dry, the curing process begins. This involves the chemical reaction that strengthens the plaster and allows it to fully harden. It typically takes about 28 days for the plaster to fully cure. During this time, it’s important to avoid any excessive moisture or physical stress on the surface.
Remember, patience is key when it comes to drying and curing plaster.
Now that the plaster is dry and cured, it’s time to move on to the next phase: adding those finishing touches.
Finishing Touches
To achieve a polished and professional look, don’t forget to add those finishing touches that’ll truly enhance the appearance of your plastered surface.
When it comes to plastering, there are certain mistakes to avoid to ensure you achieve a flawless finish. One common mistake is not properly sanding the surface before applying the finishing coat. Sanding helps to smooth out any imperfections and creates a smooth base for the final coat.
Another mistake to avoid is not using the right tools for the job. Using low-quality tools can result in uneven application and an unprofessional finish.
Additionally, be sure to apply a primer before painting to ensure the paint adheres properly and creates a long-lasting and beautiful finish.
By avoiding these mistakes and paying attention to the finishing touches, you can achieve a flawless plastered surface that’ll impress.
Frequently Asked Questions
What are the most common mistakes to avoid when preparing a surface for plastering?
When preparing a surface for plastering, it’s crucial to follow proper surface preparation techniques. This includes ensuring the surface is clean, dry, and free from any loose debris or old paint.
Additionally, using a primer before plastering is essential as it helps to create a smooth and even surface for the plaster to adhere to. By properly preparing the surface and using a primer, you can ensure a flawless finish and prevent any future issues.
It’s important to avoid common mistakes such as not cleaning the surface thoroughly, not using a primer, or using an incorrect primer. Additionally, be sure to use the correct tools and materials, and take necessary safety precautions.
Is it necessary to mix plaster with water before applying it?
Mixing plaster with water is an essential step before applying it. It’s like the perfect symphony, where water acts as the conductor, ensuring a smooth and workable consistency.
Using other liquids, like paint or adhesive, instead of water can lead to disastrous results. These substances alter the chemical composition, compromising the plaster’s ability to adhere properly and resulting in a shoddy finish.
So, stick to the tried and true method of using water for a flawless plastering experience.
How can I achieve a smooth finish when plastering walls?
To achieve a smooth finish when plastering walls, there are a few techniques that can help. First, make sure the surface is clean and free of any loose debris. Next, apply a thin layer of plaster using a trowel, making sure to spread it evenly. Use a hawk and trowel to smooth out any imperfections and create a textured finish.
For repairing damaged plaster, consider using a patching plaster or joint compound to fill in any cracks or holes before applying the final coat.
What are some common mistakes that beginners make when plastering?
To achieve a smooth finish when plastering walls, it’s crucial to avoid common mistakes that beginners often make. Lack of proper trowel technique can result in uneven surfaces and visible lines.
Additionally, inadequate surface preparation can lead to poor adhesion and an unsightly finish. To ensure success, master the art of trowelling and take the time to properly prepare the surface before applying plaster.
By doing so, you’ll achieve a flawless result that showcases your innovation and skill.
How long does it typically take for plaster to dry and cure completely?
Plaster drying time can vary depending on factors such as temperature and humidity. On average, it takes about 2-3 days for plaster to dry completely. To ensure proper curing, it’s important to follow the best techniques.
Firstly, maintain a well-ventilated area to allow moisture to evaporate. Secondly, avoid touching or disturbing the plaster during the drying process. Lastly, applying a mist of water can help control the drying speed and prevent cracking.