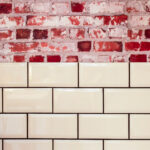
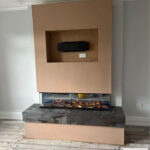
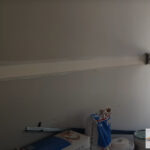
Are you ready to embark on a plastering project, but feeling overwhelmed by the array of tools available? Look no further! In this comprehensive guide, we will delve into the essential tools you need to achieve flawless results.
Like a master sculptor, you will mould and shape your plaster with the aid of trowels, the basic building blocks of any plastering project. With their precision and finesse, these tools will allow you to create smooth and seamless surfaces.
But what about achieving the perfect mix? Enter mixers, the unsung heroes of plastering. These powerful machines ensure that your mix is smooth, consistent, and ready for application.
Once your plaster is in place, it’s time to achieve that flawless finish. Floats, with their smooth surfaces and delicate touch, will be your trusted companions in this endeavour.
And let’s not forget about the brushes, scrapers, and safety equipment that will help you apply, finish, and protect yourself during the project.
So, gear up and get ready to unleash your creativity with these essential tools. Innovation awaits as you transform ordinary walls into works of art.
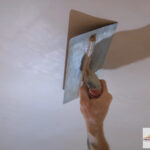
Trowels: The Basic Building Block of Plastering
When you’re ready to dive into plastering, the first tool you’ll need is a trowel – it’s like the trusty right hand that smoothes and spreads the plaster, allowing you to create a flawless finish on your walls.
Trowels come in various sizes, and choosing the right one is crucial for a successful plastering project. Larger trowels are ideal for covering larger areas quickly, while smaller trowels are perfect for intricate work.
To ensure your trowel lasts for multiple projects, proper maintenance is essential. Clean it thoroughly after each use and store it in a dry place to prevent rust. Sharpen the edges regularly to maintain its efficiency.
Now that you’ve mastered the art of trowel selection and maintenance, let’s move on to mixers: ensuring a smooth and consistent mix.
Mixers: Ensuring a Smooth and Consistent Mix
When it comes to mixing plaster, you have two options: hand mixers or power mixers. Hand mixers are great for small projects and offer more control, while power mixers are ideal for larger jobs and provide a faster, more efficient mix.
There are different types of mixers available, including paddle mixers and spiral mixers, each with their own advantages and uses.
To ensure efficient mixing, it’s important to choose the right mixer for your project, follow the manufacturer’s instructions, and use the correct mixing techniques.
Hand Mixers vs. Power Mixers
If you’re looking to save time and effort on your plastering projects, then power mixers are the way to go. Compared to hand mixers, power mixers offer numerous benefits that can greatly improve the efficiency and quality of your mixes.
Power mixers are equipped with powerful motors that can handle larger quantities of materials, ensuring a smooth and consistent mix every time. They also come with various speed settings, allowing you to adjust the mixing process according to your specific needs.
Additionally, power mixers are designed with ergonomic handles and lightweight construction, making them easy to manoeuvre and reducing fatigue during extended mixing sessions. With their advanced features and capabilities, power mixers are the perfect choice for those who desire innovation and want to achieve professional results in their plastering projects.
Now, let’s move on to the next section and explore the different types of mixers available.
Types of Mixers
To choose the right mixer for your plastering needs, you’ll want to consider the different types available. For example, a hand mixer is as versatile as a Swiss army knife, while a power mixer is as efficient as a Formula 1 car.
Hand mixers are lightweight and portable, making them perfect for small projects or areas with limited space. They require minimal maintenance and are easy to clean.
On the other hand, power mixers are designed for larger projects and can handle heavy-duty mixing with ease. They are equipped with powerful motors and adjustable speed settings for precise control.
When choosing the right mixer, consider the size of your project, the type of plaster you’ll be using, and your personal preferences. By selecting the appropriate mixer, you can ensure efficient mixing and achieve professional results.
Now, let’s move on to some tips for efficient mixing.
Tips for Efficient Mixing
Let’s dive into some helpful tips for efficient mixing! When it comes to plastering, mastering the art of mixing is crucial for achieving a flawless finish.
To ensure efficiency, start by using the appropriate mixing tools, such as a paddle mixer or a drill with a mixing attachment. These tools will help you achieve a smooth and consistent mixture.
It’s also important to measure your ingredients accurately, as any imbalance can lead to an improper mix. When mixing, make sure to follow the manufacturer’s instructions and mix for the recommended amount of time.
Avoid common mixing mistakes, such as adding too much water at once or mixing at too high of a speed. By following these efficient mixing techniques, you’ll be well on your way to a successful plastering project.
Now, let’s move on to the next section about ‘floats: achieving a flawless finish.’
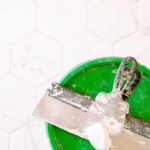
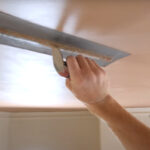
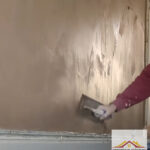
Floats: Achieving a Flawless Finish
Mastering the art of plastering requires the use of floats, the secret weapon that effortlessly glides over surfaces, leaving behind a flawlessly smooth finish. Achieving smoothness is all about the techniques for floating. When using a float, it’s important to hold it at a slight angle and apply even pressure as you move it across the plaster. This helps to remove any imperfections and create a seamless surface.
You can also use a circular motion to blend any edges or lines. Experiment with different float sizes and materials to find the one that works best for you.
Now, let’s move on to the next section about brushes: applying and finishing plaster, where we’ll explore the tools needed to perfect your plastering skills.
Brushes: Applying and Finishing Plaster
Now that you’ve achieved a flawless finish with the help of floats, it’s time to move on to the next essential tool for your plastering project: brushes.
Brushes are crucial for applying and finishing plaster, as well as creating unique textures and patterns. They come in various sizes and bristle types, allowing you to achieve different effects and finishes.
When selecting brushes for texturing, consider the type of texture you want to create and choose a brush that’ll help you achieve that desired look.
Additionally, brushes can also be used for repairing plaster by filling in cracks and smoothing out uneven surfaces. They’re versatile tools that shouldn’t be overlooked in your plastering toolkit.
As we move on to the next section about scrapers, we’ll explore how these tools can help remove imperfections and prepare surfaces.
Scrapers: Removing Imperfections and Preparing Surfaces
To achieve a smooth and flawless plastering finish, you’ll need to know how to remove imperfections and prepare surfaces using skimmers or scrapers. Scrapers are essential tools for removing any bumps, ridges, or other imperfections on the surface before applying plaster. They come in various sizes and shapes, allowing you to tackle different types of surfaces effectively.
Whether you’re working on walls, ceiling plaster, or corners, a scraper can help you achieve a clean and even surface for plastering.
Before using a scraper, it’s important to ensure that the surface is free from any loose debris or dust. This can be done by using a brush or vacuum cleaner. Once the surface is clean, you can start scraping away any imperfections. It’s crucial to use the appropriate pressure and technique to avoid damaging the underlying surface. Take your time and work systematically, ensuring that you cover the entire area.
By removing imperfections and preparing surfaces with scrapers, you’ll create a solid foundation for your plastering project. Now, let’s transition into the next section about safety equipment: protecting yourself during the project.
Safety Equipment: Protecting Yourself During the Project
Don’t let your plastering project turn into a dangerous tightrope walk – make sure you have the right safety equipment to protect yourself. When working with plaster, it’s essential to prioritize your safety.
Here are three crucial items you must have in your arsenal:
- Protective Clothing: Shield yourself from potential hazards by wearing the appropriate attire. Opt for durable work boots to protect your feet from falling debris, and wear thick gloves to safeguard your hands from sharp tools and abrasive materials. Additionally, consider donning a protective overall or coveralls to shield your body from plaster splatters and dust.
- Respiratory Masks: Plastering can release harmful dust particles into the air, which can cause respiratory issues when inhaled. Invest in a high-quality respiratory mask to filter out these particles and protect your lungs from potential harm. Look for masks with a secure fit and efficient filtration capabilities to ensure maximum safety.
By equipping yourself with the right safety gear, you can confidently tackle your plastering project while prioritizing your well-being.
Frequently Asked Questions
How do I choose the right size trowel for my plastering project?
To choose the right trowel size for your plastering project, consider the surface area you’ll be working on. For larger areas, a larger trowel with a broader blade will help you cover more ground efficiently.
Smaller trowels are ideal for detailed work and hard-to-reach spots.
As for safety equipment, it’s essential to wear it for every plastering project to protect yourself from potential hazards like dust, debris, and chemical exposure.
Are there any specific mixers recommended for mixing plaster?
For efficient and effective mixing of plaster, specific mixers are recommended. One popular option is the XYZ Plaster Mixer. It is designed with innovative features to ensure a smooth and consistent mix. Its powerful motor and adjustable speed settings allow for precise control, while its ergonomic design reduces fatigue during extended use.
With its durable construction and cutting-edge technology, the XYZ Plaster Mixer is the go-to choice for professionals looking to streamline their plastering projects.
Can floats be used for other tasks besides achieving a flawless finish in plastering?
Floats can indeed be used for other tasks besides achieving a flawless finish in plastering. They are versatile tools that can be used for levelling and smoothing concrete, grout, and other materials. Their flat surface and sturdy construction make them ideal for spreading and smoothing surfaces.
Additionally, using safety equipment in plastering projects has numerous benefits. It protects you from potential injuries, reduces the risk of accidents, and ensures a safe working environment. This allows you to focus on your innovative ideas and projects.
What types of brushes are most commonly used for applying and finishing plaster?
To achieve a flawless finish in plastering, it’s crucial to choose the right brushes. Different types of plastering brushes are commonly used for applying and finishing plaster.
Some popular options include hog’s hair brushes, nylon brushes, and synthetic brushes. However, to ensure success, it’s important to avoid common mistakes while applying plaster. This includes not using enough pressure, not applying the plaster evenly, and not cleaning the brushes properly after use.
By avoiding these mistakes and using the right brushes, you can achieve a professional and innovative plastering result.
Is safety equipment necessary for every plastering project, or are there specific circumstances where it may not be required?
Safety equipment is essential for every plastering project to protect yourself from potential hazards. However, there may be specific circumstances where safety equipment may not be necessary.
For example, if you’re working on a small repair job in a well-ventilated area, the risks may be minimal. Nevertheless, it’s always recommended to prioritize safety and use protective gear like goggles, masks, and gloves to ensure your well-being throughout the plastering process.