Are you tired of your walls resembling a cracked desert landscape? Look no further, as we present to you the ultimate solution for fixing hairline cracks in plaster. Like a master sculptor, you have the power to restore your walls to their former glory.
In this article, we will guide you through the techniques and materials that will transform your home into a haven of flawlessness. Step by step, we will help you assess the extent of the damage, prepare the surface for repair, and choose the perfect materials for the job. With our innovative techniques, you will learn how to apply the chosen repair method and achieve a smooth, seamless finish.
Say goodbye to unsightly cracks and hello to perfection. Let’s embark on this journey together and unlock the secrets of plaster repair. Your walls will thank you!
Assess the extent of the damage
Now, take a step back and really examine the plaster on your walls, feeling for any subtle irregularities or hairline cracks that might be hiding in plain sight. Understanding the causes of hairline cracks is crucial in determining the best course of action. These cracks can be caused by a variety of factors, such as settling of the building, moisture fluctuations, or even poor application of the plaster itself.
Evaluating the need for professional intervention is also important. While some hairline cracks can be easily repaired by homeowners, larger or more extensive damage may require the expertise of a professional plasterer. By assessing the extent of the damage and understanding the underlying causes, you can determine whether you can tackle the repairs yourself or if it’s necessary to call in a professional.
Now, let’s move on to preparing the surface for repair.
Prepare the surface for repair
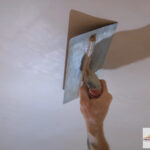
First, it’s essential to ensure the surface is properly prepped before making any repairs. This will ensure a smooth and long-lasting finish. To prepare the surface, follow these steps:
- Sanding techniques: Use a fine-grit sandpaper to gently sand the cracked area and adjacent plaster. This will help to remove any loose or flaking plaster, creating a smooth surface for the repair.
- Priming process: Apply a coat of primer to the sanded area. This will help the new plaster adhere properly and prevent further cracking. Allow the primer to dry completely before moving on to the next step.
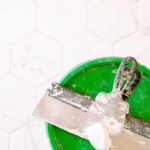
- Fill the cracks: Use a suitable filler, such as a plaster repair compound, to fill in the cracks. Apply the filler with a putty knife, ensuring it’s level with the surrounding plaster. Smooth the surface with the putty knife or a wet sponge.
Now that the surface is prepared, you can move on to choosing the right materials for the job, which’ll ensure a successful repair without the need for additional steps.
Choose the right materials for the job
To ensure a successful and long-lasting repair, you’ll need to carefully select the materials that are best suited for the task at hand. Choosing suitable products is crucial in fixing hairline cracks in plaster. Look for quality crack fillers or patching compounds specifically designed for plaster repairs. These products are usually flexible and durable, ensuring that the repaired cracks won’t reappear over time.
Additionally, consider using a primer before applying the filler to promote adhesion and create a smooth surface. Finding the right tools is equally important. A putty knife or a trowel will be needed to apply the filler, while sandpaper or a sanding block will help you achieve a seamless finish.
By choosing the appropriate materials and tools, you’ll be well-prepared to tackle the repair process.
Now, let’s transition into the subsequent section about applying the chosen repair technique.
Apply the chosen repair technique
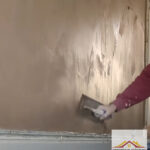
Once you’ve carefully selected the right materials and tools, it’s time to dive into the application process and bring your chosen repair technique to life.
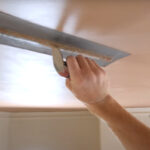
Using filler properly is crucial to achieving a seamless repair. Start by cleaning the area surrounding the crack, removing any loose plaster or debris. Then, apply the filler using a putty knife, ensuring it fills the crack completely and is level with the surrounding surface.
Smooth out any excess filler and allow it to dry according to the manufacturer’s instructions. One common mistake to avoid is overfilling the crack, as this can lead to an uneven surface. Another mistake is rushing the drying process, which can result in a weaker bond.
Once the filler is dry, you can move on to the next step of smoothing and finishing the repaired area, creating a flawless result.
Smooth and finish the repaired area
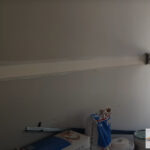
To achieve a faultless result, make sure to carefully smooth and finish the repaired area after applying the filler. This step is crucial in achieving a seamless blend between the repaired area and the surrounding plaster. Here are five techniques to help you achieve a faultless final finish:
- Use a fine-grit sandpaper to gently sand down the filled area, ensuring it’s level with the rest of the wall.
- Apply a thin layer of primer over the repaired area to create a smooth surface for painting or wallpapering.
- Use a sponge or damp cloth to remove any dust or debris left from the sanding process.
- Apply a coat of matching paint or wallpaper to seamlessly blend the repaired area with the rest of the wall.
- Finally, use a clean, dry cloth to gently buff the repaired area for a polished finish.
By following these techniques, you can achieve a faultless final finish.
Now, let’s move on to how to maintain and prevent future cracks.
Maintain and prevent future cracks
Taking proactive steps to maintain your walls and prevent future cracks will ensure a long-lasting and beautiful living space. Preventing future damage to your plaster is essential in preserving its integrity.
One effective maintenance technique is to regularly inspect your walls for any signs of cracking or damage. If you notice any hairline cracks, it’s important to address them promptly to prevent them from expanding.
Another key strategy is to control moisture levels in your home, as excessive moisture can weaken the plaster and lead to cracks. Ensure proper ventilation in rooms prone to high humidity, such as bathrooms and kitchens.
Additionally, using high-quality paint and primers specifically designed for plaster can add an extra layer of protection.
By following these effective maintenance techniques, you can keep your plaster walls in pristine condition and avoid future cracks.
Frequently Asked Questions
How long does it take for the repaired area to dry completely?
The drying time of the repaired area depends on the techniques used. However, using the best techniques can significantly reduce the drying time.
Innovative methods such as applying a thin layer of joint compound and using a hairdryer or fan can expedite the drying process. By following these techniques, you can expect the repaired area to dry completely within a few hours.
Can hairline cracks in plaster be a sign of a more serious underlying issue?
Hairline cracks in plaster can sometimes indicate a more serious underlying issue. They can be a symbol of structural problems, such as foundation issues or settling of the building. Other potential causes include temperature fluctuations, humidity, and poor construction techniques. To prevent these cracks, it’s important to address any underlying issues and ensure proper installation and maintenance. Regular inspections and timely repairs can help maintain the integrity of your plaster and prevent further damage.
In the UK, it’s especially important to be vigilant and ensure regular checks for potential cracks and underlying issues. Timely repairs and proper maintenance can help ensure the integrity of your plaster and prevent further damage.
Is it necessary to remove all existing paint or wallpaper before repairing hairline cracks in plaster?
To effectively repair hairline cracks in plaster, it isn’t always necessary to remove all existing paint or wallpaper. However, priming the surface before applying any crack fillers is essential. This ensures proper adhesion and a long-lasting repair.
There are different types of hairline crack fillers available, such as flexible fillers or fillers with reinforcing mesh. These innovative solutions offer durability and flexibility, preventing future cracks from forming.
Are there any specific tools or equipment required for repairing hairline cracks in plaster?
To repair hairline cracks in plaster, you’ll need a few essential tools and equipment. A putty knife is essential for scraping away loose debris and applying filler. Sandpaper helps smooth the repaired area. For crack repair, you’ll need a high-quality crack filler or joint compound. Additional tools like a drywall saw or utility knife may be required for larger cracks. Techniques and best practices for repairing hairline cracks include properly prepping the surface, applying multiple thin layers, and sanding between coats for a seamless finish.
Can hairline cracks in plaster reappear after they have been repaired?
Hairline cracks in plaster can indeed reappear after they’ve been repaired. This can be due to several factors, such as structural movement, settling of the building, or improper repair techniques.
It’s important to address the underlying causes of the cracks to prevent their reappearance. By using innovative materials and techniques that can accommodate movement and provide long-lasting stability, you can ensure a more effective and durable repair solution for hairline cracks in plaster.