Did you know that water damage is one of the most common issues homeowners face in the UK? In fact, it affects thousands of properties each year, causing extensive damage to plaster surfaces.
If you’re dealing with water damage on your plaster walls or ceilings, don’t panic! With the right repair tips, you can restore your space to its former glory.
This article will guide you through the process of repairing water damage on plaster surfaces. From assessing the extent of the damage to painting or wallpapering the surface, we’ll provide you with detailed, technical instructions.
You’ll learn how to remove damaged plaster, dry the area, and repair the plaster effectively. We’ll also cover sanding and priming techniques to ensure a smooth finish.
Don’t let water damage dampen your spirits. With these innovative repair tips, you can transform your damaged plaster surfaces and create a beautiful, renewed space in your home.
Let’s get started!
Assess the Extent of the Damage
Take a close look at the water-damaged plaster walls and ceilings to determine the full extent of the harm. Utilizing moisture detection techniques is crucial in identifying hidden moisture pockets and potential mold growth. By using thermal imaging cameras, moisture meters, and hygrometers, you can accurately assess the moisture levels in the affected areas.
It’s important to conduct this assessment promptly to prevent further damage and mitigate the risk of mold growth. Timely water damage assessment allows for a faster and more effective restoration process.
Once you’ve determined the extent of the damage, you can proceed to the next step of removing the damaged plaster.
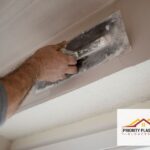
Remove Damaged Plaster
Start by rolling up your sleeves and getting your hands dirty because it’s time to bid farewell to those crumbly, damaged plaster walls. Removing the damaged plaster is the first step towards restoring your walls to their former glory. Here’s what you need to do:
- Prepare the area: Clear the surrounding area and cover the floor with a drop cloth to catch any falling debris.
- Mark the damaged area: Use a pencil to outline the section of plaster that needs to be removed. This will ensure a clean and precise cut.
- Cut the plaster: Use a utility knife or plaster saw to carefully cut along the marked lines. Take your time to avoid damaging the surrounding plaster.
- Remove the plaster: Gently pry the damaged plaster away from the wall using a pry bar or putty knife. Be careful not to damage the underlying structure.
Once you’ve successfully removed the damaged plaster, it’s time to dry the area and proceed with plaster replacement and moisture prevention.
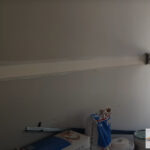
Dry the Area
Now it’s time to ensure the area is thoroughly dried out before moving on to the next step. Properly drying the area is crucial in preventing future water damage and ensuring a successful repair.
Start by using fans and dehumidifiers to increase air circulation and remove excess moisture from the affected area. Open windows and doors to facilitate the drying process. If possible, use a wet/dry vacuum to extract any remaining water from the plaster surface.
Allow sufficient time for the area to dry completely before proceeding. If you’re unsure about the effectiveness of your drying efforts, it may be wise to hire professional help to ensure the job is done right.
Once the area is dry, you can move on to repairing the plaster, which we’ll discuss in the next section.
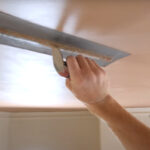
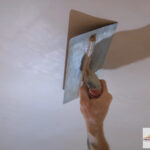
Repair the Plaster
To successfully fix the damaged plaster, it’s crucial to follow the appropriate repair techniques and methods.
Start by preparing the damaged area by removing any loose or crumbly plaster. Then, clean the surface thoroughly, removing any dirt or debris.
Next, apply a bonding agent to create a strong bond between the existing plaster and the new repair material. Once the bonding agent is dry, mix the plaster repair compound according to the manufacturer’s instructions.
Use a putty knife to apply the compound, filling in the damaged area and smoothing it out. Allow the plaster to dry completely before moving on to the next step.
With these plaster restoration techniques, you can ensure a seamless repair that blends in seamlessly with the surrounding surface.
Now, let’s move on to the next section where we’ll discuss how to sand and prime the surface.
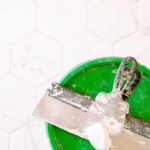
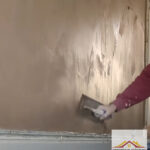
Sand and Prime the Surface
A crucial step in the process is sanding and priming the surface, creating a smooth canvas like a painter preparing a fresh canvas before creating a masterpiece.
Once you’ve repaired the plaster, it’s important to take preventative measures to avoid future water damage. One way to do this is by choosing the right primer. Look for a primer that’s specifically designed to resist water and moisture. This’ll create a protective barrier on the surface, preventing water from seeping in and causing damage. Additionally, consider using a primer that has mold and mildew resistance properties, as this’ll help prevent any growth in the future.
By properly sanding and priming the surface, you’re setting the stage for a successful repair job.
Next, we’ll discuss how to paint or wallpaper the surface seamlessly.
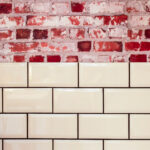
Paint or Wallpaper the Surface
Transform your space into a work of art by effortlessly painting or wallpapering the surface, adding a touch of personality and style to your home.
When it comes to water-damaged plaster surfaces, you have the option to either paint or wallpaper them. Let’s weigh the pros and cons of each.
Painting the surface offers a clean and modern look, allowing you to choose from a wide range of colors and finishes. It’s also relatively easier to repair if any future damage occurs.
On the other hand, wallpaper provides a unique and textured appearance, with various patterns and designs to choose from. It can also help to hide any imperfections on the surface. However, it may be more challenging to remove and repair in case of damage.
If you’re looking for alternative wall coverings, consider options like textured panels or fabric coverings. These can add depth and interest to your space, providing a truly innovative and stylish solution.
Frequently Asked Questions
Can I use a hairdryer to speed up the drying process after water damage on plaster surfaces?
Using a hairdryer to speed up the drying process on plaster surfaces can be a convenient option, but it’s important to bear in mind that simply using a hairdryer may not be sufficient. Proper ventilation is crucial during the drying process to prevent the growth of mold and mildew. It’s recommended to use a combination of techniques, such as using fans and dehumidifiers, to ensure effective and thorough drying. This innovative approach ensures a quick and efficient restoration of your plaster surfaces.
Is it necessary to remove all of the damaged plaster, or can I patch it up instead?
When dealing with water damage on plaster surfaces, it’s not always necessary to remove all of the damaged plaster. Depending on the extent of the damage, you can patch it up using various techniques.
One method is to use a plaster patching compound to fill in the damaged areas. Another option is to apply a plaster skim coat over the damaged surface to create a smooth finish. These techniques allow for repairing rather than replacing the damaged plaster, saving time and money.
What type of primer should I use before painting or wallpapering the surface?
Before painting or wallpapering plaster surfaces, it’s crucial to prep the surface properly to ensure a flawless finish.
The type of primer you use plays a vital role in achieving this. There are various primer types available, such as latex, acrylic, and oil-based primers.
Latex primers are popular for their quick drying time and excellent adhesion. Acrylic primers offer good stain blocking and are suitable for high humidity areas. Oil-based primers are known for their superior stain-blocking abilities.
Choose the primer that best suits your needs and follow the manufacturer’s instructions for application.
Can I use regular household paint for plaster surfaces or do I need a specific type of paint?
Using regular household paint for plaster surfaces can be a convenient option, but there are pros and cons to consider. Household paint is easily accessible and comes in a wide variety of colors. However, it may not have the durability or moisture resistance needed for water damaged plaster surfaces.
To ensure a long-lasting finish, it’s recommended to use a specific type of paint designed for water damaged plaster, such as a moisture-resistant or waterproof paint.
How long should I wait before painting or wallpapering the repaired plaster surface?
After fixing the water-damaged plaster surface, the drying time is crucial before painting or wallpapering. Typically, you should wait for the repaired plaster to dry completely, which can take anywhere from 2 to 6 weeks.
To speed up the drying process, ensure proper ventilation and use dehumidifiers.
Additionally, before painting or wallpapering, it’s important to prepare the plaster surface by cleaning it thoroughly, removing any loose particles, and applying a primer for better adhesion.