Did you know that 85% of UK homeowners believe that a smooth finish in interior plastering is essential for creating a modern and polished look in their homes? If you’re looking to transform your walls and achieve that flawless finish, you’ve come to the right place.
In this article, we will guide you through the step-by-step process of achieving a smooth finish in interior plastering in the United Kingdom.
First, you’ll need to prepare your walls by ensuring they are clean, dry, and free from any loose debris. Next, you’ll mix and apply the plaster using the correct techniques to ensure a consistent and even coat. Once the plaster is dry, you’ll sand and smooth it to remove any imperfections and create a seamless surface.
To achieve an ultra-smooth finish, you’ll then apply a skim coat, which will fill in any remaining gaps and create a flawless surface. After allowing the skim coat to dry, you can then apply a final coat of plaster or paint, depending on your desired finish.
By following these steps, you’ll be able to achieve a smooth and professional-looking finish in your interior plastering, giving your home a fresh and modern appeal. So, let’s get started and turn your walls into works of art!
Prepare the Walls for Plastering
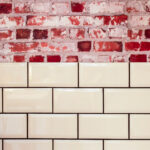
Before you start plastering, make sure to properly prepare the walls to ensure a flawless finish. Preparing surfaces is crucial for achieving a smooth result.
Start by inspecting the walls for any cracks or holes. Use a scraper or putty knife to remove any loose or flaking paint, and fill in any cracks with a suitable filler. It’s important to ensure that the surface is clean and free from dust or dirt before proceeding.
Give the walls a thorough wipe down with a damp cloth to remove any debris. This will provide a smooth and even base for the plaster to adhere to.
Once the walls are prepared, you can move on to the next step of mixing and applying the plaster.
Mix and Apply the Plaster
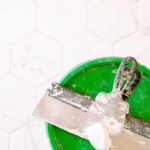
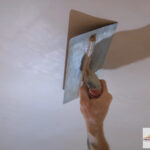
To create a flawless result, it’s crucial to expertly mix and apply the plaster. Start by ensuring the mixing consistency is just right – not too thick or thin. Use a clean bucket and add the plaster mix gradually while stirring continuously.
The tools you’ll need include a plastering trowel, a hawk, and a mixing paddle or drill attachment. Once the plaster is mixed to the desired consistency, you can begin applying it to the prepared walls. Start from the bottom and work your way up, using smooth, even strokes. Make sure to cover the entire surface evenly and avoid leaving any gaps or ridges.
As you finish applying the plaster, transition smoothly into the next step of sanding and smoothing for a flawless finish.
Sand and Smooth the Plaster
Now, get ready to transform your walls into a flawless masterpiece by sanding and smoothing the plaster to perfection. To achieve a smooth finish, it’s crucial to use proper sanding techniques. Here are four essential tips to help you achieve that flawless look:
- Start with coarse sandpaper: Begin by using coarse-grit sandpaper to remove any unevenness or imperfections on the plaster surface. This’ll create a smooth and even base for the next steps.
- Progress to finer grits: Gradually switch to finer grit sandpaper as you work your way towards achieving a smooth finish. This’ll help to refine the surface and eliminate any visible scratches or marks left by the coarse sandpaper.
- Use a sanding block: To ensure even pressure and consistent results, use a sanding block instead of your hand. This’ll help to prevent uneven sanding and create a uniform finish.
- Check for smoothness: Regularly check the surface for smoothness by running your hand across it. If you feel any rough patches or inconsistencies, continue sanding until you achieve a perfectly smooth finish.
Now that you’ve mastered the art of sanding, it’s time to move on to the next step and apply a skim coat for an even more flawless finish.
Apply a Skim Coat
Applying a skim coat can enhance the overall appearance of your walls, but have you ever wondered how this simple step can make such a difference?
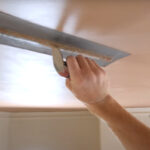
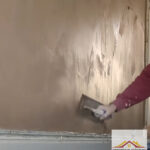
A skim coat is a thin layer of plaster or joint compound that’s applied over the existing surface to create a smooth and seamless finish. To achieve a seamless skim coat, there are a few tips you can follow.
First, make sure the surface is clean and free of any debris or dust. Next, mix the plaster or joint compound according to the manufacturer’s instructions. Use a trowel or a wide knife to apply the skim coat in thin, even layers, working from top to bottom. Avoid applying too much pressure, as this can create uneven thickness.
Finally, use a sanding block or sandpaper to lightly sand the dried skim coat to achieve a smooth finish. Common mistakes to avoid when applying a skim coat include applying too thick of a coat, not allowing enough drying time between coats, and not sanding the skim coat properly.
By following these tips and avoiding common mistakes, you can achieve a flawless and professional-looking skim coat.
Now, let’s move on to the next step: allowing the skim coat to dry.
Allow the Skim Coat to Dry
To ensure a successful skimming coat, it’s crucial to follow the drying time instructions provided on the plaster packaging.
Avoid touching or disturbing the skimming coat during the drying process, as this can lead to imperfections and unevenness.
Additionally, keeping the room well ventilated will aid in the drying process, allowing for a smoother finish.
Follow the Drying Time Instructions on the Plaster Packaging
Make sure to check the plaster packaging for the recommended drying time to achieve a smooth finish in your interior plastering project. The drying time is of utmost importance as it directly affects the final outcome of your plastering job.
Different factors can influence the drying time, such as humidity, temperature, and thickness of the plaster coat. By following the instructions on the plaster packaging, you ensure that the plaster has enough time to dry thoroughly and evenly. Rushing the drying process can lead to cracks, uneven texture, and an overall unsatisfactory finish.
Once you have confirmed the recommended drying time, it’s crucial to avoid touching or disturbing the skim coat during the drying process. This will help maintain the integrity of the plaster and prevent any imperfections from forming.
Avoid Touching or Disturbing the Skim Coat During the Drying Process
During the drying process, it’s crucial that you resist the temptation to touch or disturb the skim coat, as this could ruin all your hard work and leave you with a disappointing result. Avoiding mistakes is key to achieving a flawless finish in interior plastering. To help you stay on track, here are three important things to remember:
- Keep pets and children away from the freshly plastered walls to prevent accidental damage.
- Don’t lean or rest anything against the walls, as this can leave marks or indentations.
- Refrain from applying any additional coats or touching up areas until the skim coat is completely dry.
Following these guidelines will ensure that your plastering job remains intact and allows for a smooth and flawless result.
To further aid in the drying process and achieve the best outcome, it’s important to keep the room well-ventilated. This will be discussed in the next section.
Keep the Room Well Ventilated to Aid in Drying
Airing out the room will help speed up the drying process, allowing the skim coat to cure properly and prevent any potential issues. To maximize airflow, open windows and doors to create a cross breeze. This will encourage the moisture in the plaster to evaporate more quickly.
Additionally, you can use dehumidifiers to remove excess moisture from the air, further aiding in the drying process. By keeping the room well ventilated, you can ensure that the plaster dries evenly and smoothly, resulting in a flawless finish.
Once the skim coat is completely dry, you can then proceed to apply a final coat of plaster or paint to achieve the desired look for your interior walls.
Apply a Final Coat of Plaster or Paint
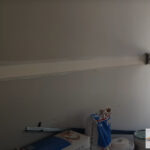
To achieve a smooth finish in interior plastering in the UK, it’s crucial to apply a final coat of plaster or paint. This final layer will help to hide any imperfections and give your walls a polished look.
Here are three key steps to follow when applying the final coat:
- Use the right tools: Ensure you have the proper tools for the job, such as a trowel or plastering float, to apply the plaster or paint smoothly and evenly.
- Apply the coat evenly: Start at one corner of the room and work your way across, using long, sweeping motions. Make sure to overlap each stroke slightly to avoid streaks or lines.
- Sand and smooth: After the final coat has dried, use a fine-grit sandpaper to gently sand down any rough patches or bumps. This will help create a flawless, smooth finish.
By following these finishing techniques and choosing the right tools, you can achieve a professional-looking smooth finish in your interior plastering project.
Frequently Asked Questions
Can I apply plaster directly onto wallpaper or textured surfaces?
Yes, you can apply plaster directly onto wallpaper or textured surfaces. However, it’s important to prepare the surface properly. For painted walls, make sure they’re clean and free from any loose or flaking paint. Use a primer to create a smooth surface before applying the plaster.
When dealing with textured surfaces, consider using a thicker plaster mix and using techniques such as skimming or floating to achieve a smooth and even finish.
Do I need to apply a primer before plastering the walls?
You don’t necessarily need to apply a primer before plastering the walls, but it can greatly improve the results. A primer creates a smooth, even surface for the plaster to adhere to, ensuring a flawless finish. However, if you’re looking for alternative options, you can use a mist coat or a PVA bonding agent.
A mist coat is a diluted emulsion paint that helps seal the surface, while a PVA bonding agent enhances adhesion.
How long does it take for the plaster to dry before I can sand it?
The drying time of plaster before sanding can vary depending on several factors such as temperature and humidity. On average, it takes around 24 to 48 hours for plaster to dry completely. However, it’s important to wait until the plaster is completely dry before sanding to avoid damaging the surface. Once dry, you can use a sanding block or sandpaper to smooth out any imperfections and achieve a flawless finish.
Can I use regular paint to finish the plastered walls?
You can use regular paint to finish the plastered walls for a smooth finish. However, there are other options available that can give you a more innovative look. For a smooth finish, consider using a high-quality paint with a flat or eggshell finish. This will help to hide imperfections and create a sleek, modern look.
Additionally, make sure to properly prepare the walls by sanding and priming them before applying the paint.
What are the common mistakes to avoid when applying a skim coat?
To achieve a smooth finish when applying a skim coat, there are common mistakes you should avoid.
First, make sure to properly prepare the surface by removing any loose debris and applying a primer.
Avoid applying too much pressure while spreading the skim coat, as this can lead to unevenness.
Additionally, make sure to work quickly and smoothly to prevent the skim coat from drying unevenly.
Finally, sand the surface lightly between coats for a flawless finish.