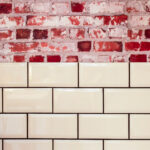
Achieving a professional-level plastering finish is like creating a flawless canvas for your walls, transforming them into works of art. Just as a skilled painter uses precise brushstrokes to craft a masterpiece, you too can achieve perfection with the right techniques and tools.
In this article, we will guide you through pro tips that will elevate your plastering skills to new heights, specifically tailored for the UK market.
To achieve a professional-level finish, it all begins with proper surface preparation. By meticulously cleaning and repairing any imperfections, you ensure a smooth foundation for your plaster.
Next, armed with the right tools and materials, you’ll be able to apply the plaster correctly, creating a seamless and even surface. It’s all about attention to detail, smoothing and levelling the plaster to perfection.
If needed, a second coat can be applied to enhance the finish, ensuring a flawless result. And finally, a top coat will add that final touch of finesse.
With these pro tips, you’ll be well on your way to achieving a professional-level plastering finish that will leave your walls looking impeccable and innovative.
Prepare the Surface Properly
Before you start plastering, make sure you’ve properly prepped the surface by removing any loose paint or wallpaper and filling in any cracks or holes with a suitable filler.
Surface preparation is crucial for achieving a professional-level plastering finish in the UK. By removing any loose paint or wallpaper, you create a clean and stable foundation for the plaster to adhere to. Filling in cracks and holes ensures a smooth and even surface, preventing any imperfections from showing through the plaster.
Additionally, priming the surface before plastering is essential as it helps the plaster adhere better and provides a uniform base for a flawless finish.
Once you’ve properly prepped the surface, you can move on to the next step, which is using the right tools and materials for the job.
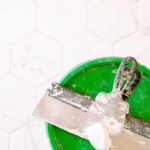
Use the Right Tools and Materials
To achieve a flawless result, make sure you’re using the correct tools and materials for the job. Proper technique is essential in achieving a professional-level plastering finish. Avoiding common mistakes such as using the wrong tools or materials can save you time and frustration.
Start by selecting the right plastering mix for your specific project. Different mixes are available for different surfaces and purposes, so choose wisely. Troubleshooting common issues like uneven drying or cracking can be avoided by using high-quality tools and materials.
Invest in a good quality trowel, hawk, and plastering board to ensure smooth and even application. Additionally, using a mixing paddle or drill with a plastering attachment can help you achieve a consistent and lump-free mix.
With the right tools and materials, you’ll be ready to move on to the next step of applying the plaster correctly.
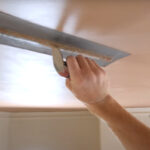
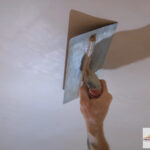
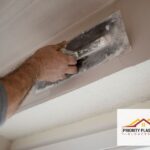
Apply the Plaster Correctly
Master the art of applying plaster correctly to achieve a flawless and professional result. Avoid common mistakes like applying too much or too little plaster, which can result in an uneven finish.
Start by preparing the surface properly, ensuring it’s clean, dry, and free from any loose debris. Mix the plaster according to the manufacturer’s instructions, using a clean bucket and a plasterer’s whisk.
Apply the plaster evenly and smoothly using a trowel, working in small sections at a time. Use a hawk or a board to hold the plaster and keep it at the right consistency. If you encounter any issues, such as bubbles or rough spots, use troubleshooting techniques like smoothing them out with a damp sponge or trowel. This will ensure a flawless finish.
Smooth and level the surface by gently running a straight edge or a plasterer’s rule over it, removing any excess plaster. Transitioning into the next section, achieving a smooth and level surface is crucial for achieving a professional plastering finish.
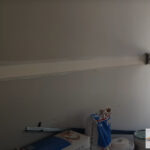
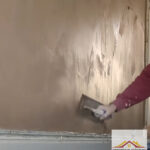
Smooth and Level the Surface
Make sure you’ve got a smooth and levelled surface before you start plastering if you want to achieve a flawless finish. This step is crucial as any imperfections on the surface will be magnified once the plaster is applied.
Start by assessing the surface for any bumps or uneven areas. Use a sanding block or sandpaper to smooth out any rough spots. Make sure to sand in a circular motion to avoid creating scratches.
After sanding, wipe the surface clean with a damp cloth to remove any dust or debris. By taking the time to properly sand the surface, you’ll create a smooth canvas for the plaster to adhere to, resulting in a professional-level finish.
Now, let’s move on to the next section about applying a second coat if needed.
Apply a Second Coat if Needed
If you want a flawless finish, don’t forget to apply a second coat if needed – it’s your chance to perfect your plastering skills and ensure a stunning result that will leave you feeling accomplished and proud.
Before applying the second coat, take the time to inspect the surface for any unevenness or imperfections that may need to be addressed. If you notice any areas that aren’t perfectly smooth or level, use sandpaper to gently sand them down until they’re. This step is crucial for achieving a professional-level finish.
Once you’ve fixed any unevenness, you can proceed with applying the second coat. This additional layer will help to further smooth out the surface and provide a more solid base for the final top coat. So, make sure to take the time to apply a second coat when needed before moving on to the next step of finishing with a top coat.
Finish with a Top Coat
To achieve a flawless and impressive result, don’t forget to finish off with a top coat. This will give your plastering project that final touch of perfection that’ll leave you feeling accomplished and proud. Choosing the right top coat is crucial for achieving a professional finish. Look for a top coat that’s specifically designed for plastering, as it’ll provide the best results.
Avoid common mistakes when applying the top coat by ensuring that the surface is clean and free of any debris or dust. Use a high-quality brush or roller to apply the top coat evenly, working in small sections to prevent streaks or unevenness. Take your time and apply thin layers, allowing each coat to dry completely before applying the next.
By following these tips, you can achieve a professional-level plastering finish that’s sure to impress.
Frequently Asked Questions
How long should I let the plaster dry before applying a second coat?
To achieve a professional-level plastering finish, it’s crucial to ensure proper drying time before applying a second coat. Many believe that waiting 24 hours is sufficient, but the truth is that it may not be enough.
To achieve optimal results, consider using a mist coat before applying the second coat. This helps to create a strong bond and ensures a smooth, flawless finish.
Don’t rush the process – give your plaster enough time to dry completely for a truly professional result.
Can I use any type of plaster for plastering walls?
You can’t use just any type of plaster for plastering walls. There are different types of plaster available, each with its own benefits for wall plastering. For example, gypsum plaster is commonly used for interior walls because it sets quickly and provides a smooth finish. Lime plaster, on the other hand, is ideal for older buildings as it allows the walls to breathe. By using the right type of plaster, you can achieve a professional-level finish that meets your specific needs.
In the United Kingdom, it’s important to use the correct spellings, such as ‘plastering’ instead of ‘plastering’.
What should I do if I notice cracks or imperfections in the plaster after it has dried?
If you notice cracks or imperfections in the dried plaster, don’t worry! It’s a common issue that can be easily fixed. To repair cracks, use a flexible filler designed specifically for plaster. Make sure to clean the area thoroughly and apply the filler with a putty knife, smoothing it out for a seamless finish.
For filling imperfections, use a fine surface filler and sand it down for a flawless result. Innovation in plaster repair techniques can ensure a professional-level finish.
Is it necessary to sand the surface before applying the top coat?
Yes, it’s necessary to sand the surface before applying the top coat. Sanding helps create a smooth and even surface, allowing the top coat to adhere properly. However, there are alternative methods of preparing the surface for top coat application, such as using a primer or skim coating.
Proper surface preparation is crucial for achieving a smooth plastering finish. It ensures that the top coat goes on evenly and hides any imperfections.
Can I paint directly over the plaster or do I need to apply a primer first?
When it comes to achieving a professional-level plastering finish, primer vs. direct painting is a crucial decision. While some may argue that you can paint directly over the plaster, using a primer first is highly recommended.
A primer creates a smooth surface, helps the paint adhere better, and prevents any imperfections from showing through. It’s a pro tip that can make a significant difference in the final result, giving your plastered walls a flawless and polished appearance.