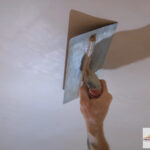
Are you ready to dive into the fascinating world of interior plastering? Welcome to an article that will take you on a journey through the intricate process of drying and curing in interior plastering in the UK. Just like a symphony conductor, proper drying and curing are essential for achieving a flawless finish in your plastering projects.
Imagine the drying process as a delicate dance, where moisture is carefully evaporated, allowing the plaster to harden and set. And the curing process? It’s like a magical transformation, where the plaster gains strength and durability over time.
In this article, we will explore the key differences between drying and curing, and the factors that influence these processes. We will also delve into various techniques for accelerating the drying and curing, as well as best practices to ensure a successful outcome.
And for those innovative minds, we’ll troubleshoot common issues that may arise during drying and curing, providing you with the knowledge to overcome any obstacle.
So, tighten your work boots, and let’s explore the wonders of drying and curing in interior plastering like never before!
Importance of Proper Drying and Curing in Interior Plastering
To ensure a high-quality finish, it’s crucial that you allow for proper drying and curing of the interior plaster. This will not only enhance its strength and durability but also prevent any potential cracks or imperfections from forming over time.
One beneficial tool to utilize during the drying and curing process is a moisture meter. By measuring the moisture content of the plaster, you can determine when it’s ready for the next step, ensuring optimal results.
Additionally, it’s essential to avoid common mistakes such as rushing the process and not providing enough ventilation. Insufficient drying time or inadequate airflow can lead to moisture trapped within the plaster, resulting in weakened structure and potential damage.
Now, let’s explore the difference between drying and curing to further understand the importance of each stage.
The Difference Between Drying and Curing
What is the distinction between drying and curing, and why does it matter?
In interior plastering, drying refers to the process of removing moisture from the plaster, while curing is the chemical reaction that occurs between the plaster and the air. Understanding this difference is crucial because it affects the quality and durability of the plaster.
To accelerate the drying process, various techniques can be employed. These include increasing air circulation, using dehumidifiers, and applying heat. Troubleshooting issues during drying involve addressing problems such as uneven drying, cracking, or blistering.
Factors affecting the drying and curing process include temperature, humidity, ventilation, and the type of plaster used. By controlling these factors, one can achieve optimal drying and curing conditions, resulting in a strong and long-lasting plaster finish.
Moving on to the next section about factors affecting the drying and curing process, let’s explore how these variables can be manipulated to achieve the desired results.
Factors Affecting the Drying and Curing Process
The variables controlling the drying and curing process can be manipulated to create a strong and long-lasting plaster finish, resulting in a sense of accomplishment and pride in your work. To ensure a successful outcome, it’s important to understand the factors that can affect the drying and curing process.
Here are three key factors to consider:
- Humidity: High humidity levels can prolong the drying and curing process, leading to potential issues such as cracking and shrinkage. It’s crucial to control the humidity in the environment where the plaster is drying to achieve optimal results.
- Temperature: The temperature of the drying area plays a significant role in the drying and curing process. Higher temperatures can accelerate the process, while lower temperatures can slow it down. It’s important to maintain an appropriate temperature range for optimal drying and curing.
- Ventilation: Proper ventilation is essential to allow moisture to escape from the drying plaster. Insufficient ventilation can result in trapped moisture, leading to longer drying times and a negative impact on the final finish.
Understanding these common mistakes and their impact on the final finish will help you achieve the best results in your plastering work.
In the next section, we’ll explore techniques for accelerating the drying and curing process.
Techniques for Accelerating the Drying and Curing Process
Speed up the drying and curing process by utilizing these techniques that’ll have your plaster finish ready in no time.
One of the most effective accelerating techniques is the use of dehumidifiers. These devices remove excess moisture from the air, creating a drier environment that promotes faster drying.
Another efficient method is the application of heat. By using heaters or blowers, you can increase the temperature in the room, which’ll expedite the evaporation of water from the plaster.
Additionally, proper ventilation plays a crucial role in accelerating the drying and curing process. Opening windows or using fans helps circulate fresh air, aiding in moisture evaporation.
Lastly, using additives or admixtures in the plaster mix can also speed up the process. These include accelerators or setting compounds that promote quicker setting and hardening.
Incorporating these accelerating techniques and efficient methods will ensure a speedy drying and curing process for your interior plastering.
Transitioning into the subsequent section about “best practices for proper drying and curing,” it’s important to follow these guidelines to achieve optimum results.
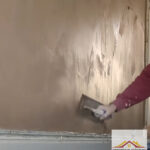
Best Practices for Proper Drying and Curing
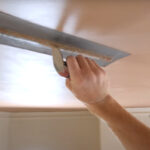
To achieve optimum results, you should follow these best practices for properly drying and curing your plaster finish. First, consider using accelerated drying techniques to speed up the process. This can include using dehumidifiers, fans, or even heat lamps to create a controlled environment that promotes faster drying.
Additionally, ensure proper ventilation to allow moisture to escape and prevent mold growth. Common curing problems, such as cracking or uneven drying, can be minimized by applying thin layers of plaster and allowing each layer to dry completely before adding another.
It’s also important to avoid rushing the process and give the plaster enough time to cure naturally. Remember, proper drying and curing are crucial for a long-lasting and flawless plaster finish.
Transitioning into the subsequent section about troubleshooting common issues in drying and curing, it’s important to be aware of potential problems that may arise during this process.
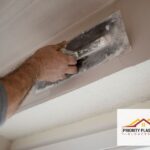
Troubleshooting Common Issues in Drying and Curing
Now that you understand the best practices for proper drying and curing, it’s important to be aware of common issues that can arise during this process. Troubleshooting these issues is crucial to ensure a successful outcome for your interior plastering project.
Here are some tips for efficient drying and curing:
- Temperature control: Maintaining a consistent temperature is essential for proper drying. Fluctuations can lead to uneven drying and cause cracks or other defects.
- Ventilation: Adequate airflow is necessary to remove excess moisture and promote drying. Poor ventilation can result in prolonged drying times and potential mold growth.
- Avoiding common mistakes: Over-applying plaster, using incorrect mixing ratios, or rushing the drying process can all lead to problems. Take your time and follow the manufacturer’s instructions carefully.
By implementing these tips, you can avoid common mistakes and ensure an efficient drying and curing process for your interior plastering project.
Frequently Asked Questions
What are the common mistakes to avoid during the drying and curing process in interior plastering?
To achieve optimal results in interior plastering, it’s crucial to avoid common mistakes during the drying and curing process. One interesting statistic reveals that around 80% of plastering failures are due to improper drying techniques. To prevent these mistakes, here are some tips and tricks:
- Ensure proper ventilation.
- Avoid over-sanding.
- Use the right amount of water in the mix.
- Allow sufficient drying time between coats.
By following these guidelines, you can ensure a flawless finish and innovative plastering results.
How long does it typically take for plaster to dry and cure in different weather conditions?
In different weather conditions, the drying and curing time of plaster can vary due to various factors. Factors such as temperature, humidity, and ventilation play a significant role in determining the drying time.
Higher temperatures and lower humidity levels generally result in faster drying. To test if the plaster is fully dried and cured before applying paint or wallpaper, you can use a moisture meter or perform a simple touch test.
It’s crucial to ensure that the plaster is completely dried and cured to avoid any issues with the final finish.
Can you apply paint or wallpaper to newly plastered walls before they are completely dry and cured?
Before applying paint or wallpaper to newly plastered walls, it’s crucial to ensure they’re completely dry and cured. A fascinating statistic reveals that, on average, it takes about 2-3 weeks for plaster to dry and cure in ideal weather conditions.
To prepare the walls, start by cleaning off any dust or debris. Then, apply a primer to create a smooth surface for paint or wallpaper. Use recommended techniques, such as sanding and filling, to achieve a flawless finish.
Are there any specific products or additives that can be used to speed up the drying and curing process?
To speed up the drying and curing process of newly plastered walls, there are several techniques and best practices you can employ. One option is to use specific products or additives designed to accelerate the process. These can include drying agents or accelerators that help to remove excess moisture and promote faster evaporation.
Additionally, ensuring proper ventilation and air flow in the room can also help to expedite the drying and curing process.
What should be done if the plaster starts to crack or peel during the drying and curing process?
To fix cracks in drying plaster, first, identify the cause. If it’s due to excessive drying, mist the affected area with water and allow it to dry gradually. For wider cracks, use a joint compound and apply it with a putty knife, making sure to blend it with the surrounding plaster.
To prevent peeling, ensure proper surface preparation, use high-quality materials, and apply plaster in thin, even layers. Regularly inspect the drying plaster for any signs of cracking or peeling and take prompt action to address them.