Have you ever experienced the frustration of a plaster ceiling repair that just doesn’t quite blend in? You meticulously apply the compound, smooth it out, and paint over it, only to have the imperfections still visible.
It’s a common problem, but fear not, because we have the techniques you need to conceal those imperfections and achieve a flawless finish.
In the world of plaster ceiling repairs in the UK, assessing the damage and properly preparing the surface is crucial. By choosing the right repair materials and applying the plaster compound with precision, you can ensure a seamless repair.
But it doesn’t stop there. Smoothly blending the repair, priming, and painting the area are essential steps to achieving a flawless result.
With our knowledgeable, detail-oriented approach, you can confidently tackle any imperfections in your plaster ceiling repairs. Our techniques are tried and tested, ensuring that your repairs not only look great now, but also stand the test of time.
So say goodbye to unsightly repairs and hello to a perfectly finished plaster ceiling. Let’s get started on concealing those imperfections today.
Assess the Damage and Prepare the Surface
Before diving into the plaster ceiling repair process, it’s crucial to carefully assess the extent of the damage and prepare the surface accordingly, ensuring a smooth and flawless finish.
Start by evaluating the extent of the imperfections, whether it’s small cracks or larger areas that need attention. Take your time to thoroughly inspect the ceiling and identify any underlying issues that may have caused the damage.
Once you have a clear understanding of the scope, it’s time to fill in the cracks and create a solid foundation for the repair. Use a high-quality filler specifically designed for plaster repairs, ensuring it adheres well and dries to a strong finish. This step is crucial in achieving a seamless end result.
Now that you have assessed the damage and filled in the cracks, it’s time to move on to choosing the right repair materials for a successful plaster ceiling restoration.
Choose the Right Repair Materials
When it comes to choosing the right repair materials for your plaster ceiling, there are a few key points to keep in mind. First, make sure to select the appropriate plaster compound for your specific repair needs. This will ensure that the compound adheres well and provides a durable finish.
Additionally, using mesh tape for added reinforcement can help strengthen the repaired area and prevent future cracking or damage.
Select the appropriate plaster compound
To achieve flawless results in plaster ceiling repairs, it’s essential to choose the right plaster compound for the job. When selecting the appropriate plaster compound, consider factors such as the type and extent of damage to the ceiling. Choosing the right compound will ensure a smooth and seamless repair.
Before applying the plaster, proper surface preparation is crucial. Make sure to clean the damaged area thoroughly and remove any loose debris or old paint. This will help the compound adhere better and result in a more durable repair.
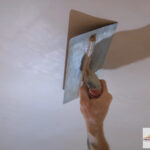
Once the surface is prepared, apply the plaster compound evenly and level it with a putty knife or trowel. Smooth out any imperfections to create a seamless finish.
For added reinforcement, consider using mesh tape before applying the plaster compound. This will help prevent future cracks and ensure a long-lasting repair.
Transitioning into the subsequent section, using mesh tape for added reinforcement can further enhance the durability of your plaster ceiling repairs.
Use mesh tape for added reinforcement
Using mesh tape for added reinforcement can significantly enhance the durability of your plaster ceiling repairs. Here are four benefits of using mesh tape:
- Increased strength: Mesh tape acts as a strong foundation for the plaster compound, preventing cracks and ensuring long-lasting repairs.
- Easy application: The self-adhesive nature of mesh tape makes it quick and hassle-free to apply, saving you time and effort.
- Seamless finish: Mesh tape creates a smooth surface, allowing the plaster compound to blend seamlessly with the surrounding ceiling, disguising any imperfections.
- Versatility: Mesh tape can be used for various types of repairs, including small cracks and larger holes, making it a versatile choice for concealing imperfections.
While there are alternative reinforcement methods available, mesh tape remains a popular choice due to its effectiveness and ease of use.
Now, let’s move on to the next section and learn how to apply the plaster compound for a flawless finish.
Apply the Plaster Compound
First, gather all the necessary materials and get ready to apply the plaster compound to your ceiling repairs in the UK. To achieve a seamless repair, it’s crucial to match the compound consistency with the existing plaster. This will ensure a smooth and even result.
Start by mixing the plaster compound according to the manufacturer’s instructions, making sure it isn’t too thick or too runny. Apply the compound to the repaired area using a putty knife, spreading it evenly and filling any gaps or cracks.
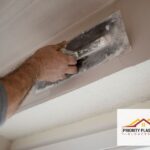
Once the compound is dry, sand the repaired area using fine-grit sandpaper to create a smooth surface. Pay attention to the edges, feathering them out to blend seamlessly with the surrounding plaster. This’ll help achieve a flawless finish that seamlessly merges with the rest of your ceiling.
Smooth and Blend the Repair
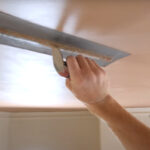
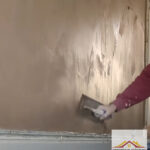
Smooth and blend the repair to create a flawless finish that seamlessly merges with the rest of your ceiling, giving it a professional look.
Start by feathering the edges of the repair area, gradually tapering the plaster compound into the surrounding ceiling. This technique helps to create a smooth transition and prevents any noticeable lines or bumps.
Once the compound is dry, use sanding techniques to further refine the repair. Begin with a coarse sandpaper to remove any high spots or unevenness, and then switch to a finer grit sandpaper for a smoother finish. Take your time and use light, even strokes to avoid damaging the surrounding plaster.
By carefully smoothing and blending the repair, you’ll achieve a seamless result that will be ready for the next step of priming and painting the repaired area.
Prime and Paint the Repaired Area
To achieve a flawless finish that seamlessly merges with the rest of your ceiling, start by priming and painting the repaired area. This will give it a professional look. Before applying the primer, make sure the repaired area is clean and free from any dust or debris. You can achieve this by using a damp cloth or sponge to wipe away any dirt.
Once the area is clean, apply a coat of primer specifically designed for plaster surfaces. This will ensure that the paint adheres properly and provides a smooth base for the final paint coat. After the primer has dried, it’s time to paint. Choose a high-quality paint that matches the color of your ceiling, and apply it evenly using a roller or brush.
Take your time and apply multiple thin coats, allowing each coat to dry thoroughly before applying the next. This will result in a professional-looking finish that seamlessly blends in with the rest of your ceiling. By following these preparation and finishing techniques, you can achieve a flawless repair that’ll make your ceiling look as good as new. Consult with a plastering service if needed.
Moving forward to maintaining and preventing future damage, it’s important to…
Maintain and Prevent Future Damage
In order to ensure the longevity of your repaired area, it’s crucial to regularly inspect your ceiling for any signs of damage or wear.
By staying proactive and vigilant, you can prevent future damage and maintain the integrity of your plaster ceiling repairs.
One important step is to prevent moisture from seeping into the repaired area. Moisture can weaken the plaster and lead to cracks or peeling paint. Make sure to fix any leaks or plumbing issues promptly to avoid water damage.
Additionally, sealing cracks is essential in preventing further deterioration. Use a high-quality sealant that’s compatible with plaster to fill in any gaps or cracks in the repaired area. This will help to maintain the structural integrity of the ceiling and prevent future damage.
By following these maintenance techniques, you can keep your plaster ceiling repairs looking fresh and flawless for years to come.
Frequently Asked Questions
Can I use a different type of repair material for small imperfections in my plaster ceiling?
You have a range of options when it comes to repairing small imperfections in your plaster ceiling. Different types of repair materials can be used, each with their own pros and cons.
One interesting statistic to consider is that using alternative repair materials can save you time and effort. However, it’s important to note that these materials may not provide the same level of durability as traditional plaster.
So, whilst they can be a convenient solution, it’s crucial to weigh the trade-offs before making a decision.
How long should I wait before applying paint to the repaired area?
After repairing small imperfections in your plaster ceiling, you should allow enough drying time before painting. The drying time can vary depending on the type of repair material used, but typically it takes around 24 to 48 hours for the repaired area to fully dry.
It’s important to ensure that the area is completely dry before applying paint, as painting too soon can result in a poor finish and compromised durability.
Following this painting timeline will help you achieve a flawless and long-lasting result.
Are there specific tools or equipment that I need to have in order to repair a plaster ceiling?
To repair a plaster ceiling, you’ll need specific tools and equipment. First, gather a plastering trowel, hawk, and joint knives of various sizes. These tools will help you apply and smooth the plaster.
You’ll also need a mixing paddle and sturdy bucket for preparing the plaster mix. A ladder or scaffolding is essential for reaching the ceiling. Additionally, having a utility knife, sandpaper, and a vacuum cleaner will aid in the cleaning and finishing process.
What are some common causes of plaster ceiling damage in the UK?
Plaster ceiling damage in the UK can occur due to various causes, such as water leaks, structural issues, or even accidental impacts.
Prevention is key, and it starts with regular inspections and maintenance. Be proactive by fixing any leaks promptly and reinforcing weak areas. Utilize innovative solutions like waterproof sealants or reinforced mesh to strengthen vulnerable spots.
By taking these measures, you can prevent plaster ceiling damage and ensure a long-lasting, flawless finish.
Is it possible to repair a plaster ceiling without removing the entire damaged section?
Yes, it’s possible to repair a plaster ceiling without removing the entire damaged section. Alternative methods include patching the damaged area with a joint compound or using a plaster repair kit. The pros of these methods are that they’re cost-effective and can save time compared to replacing the entire ceiling. However, the cons are that the repaired area may not perfectly match the surrounding ceiling and may require additional touch-ups to conceal imperfections.